Have you ever found yourself in a situation where you needed to start a fire without matches? Whether you’re an avid camper, an outdoor enthusiast, or simply want to learn a new skill, our “Ultimate Guide to Starting a Fire Without Matches” is here to help. In this comprehensive guide, we will share various techniques and methods that will ignite your curiosity and ensure you never get caught without a cozy campfire again. Get ready to unlock the secrets of fire starting as we take you on a friendly and informative journey through the art of generating flames without relying on traditional matches.
Using the Bow Drill Method

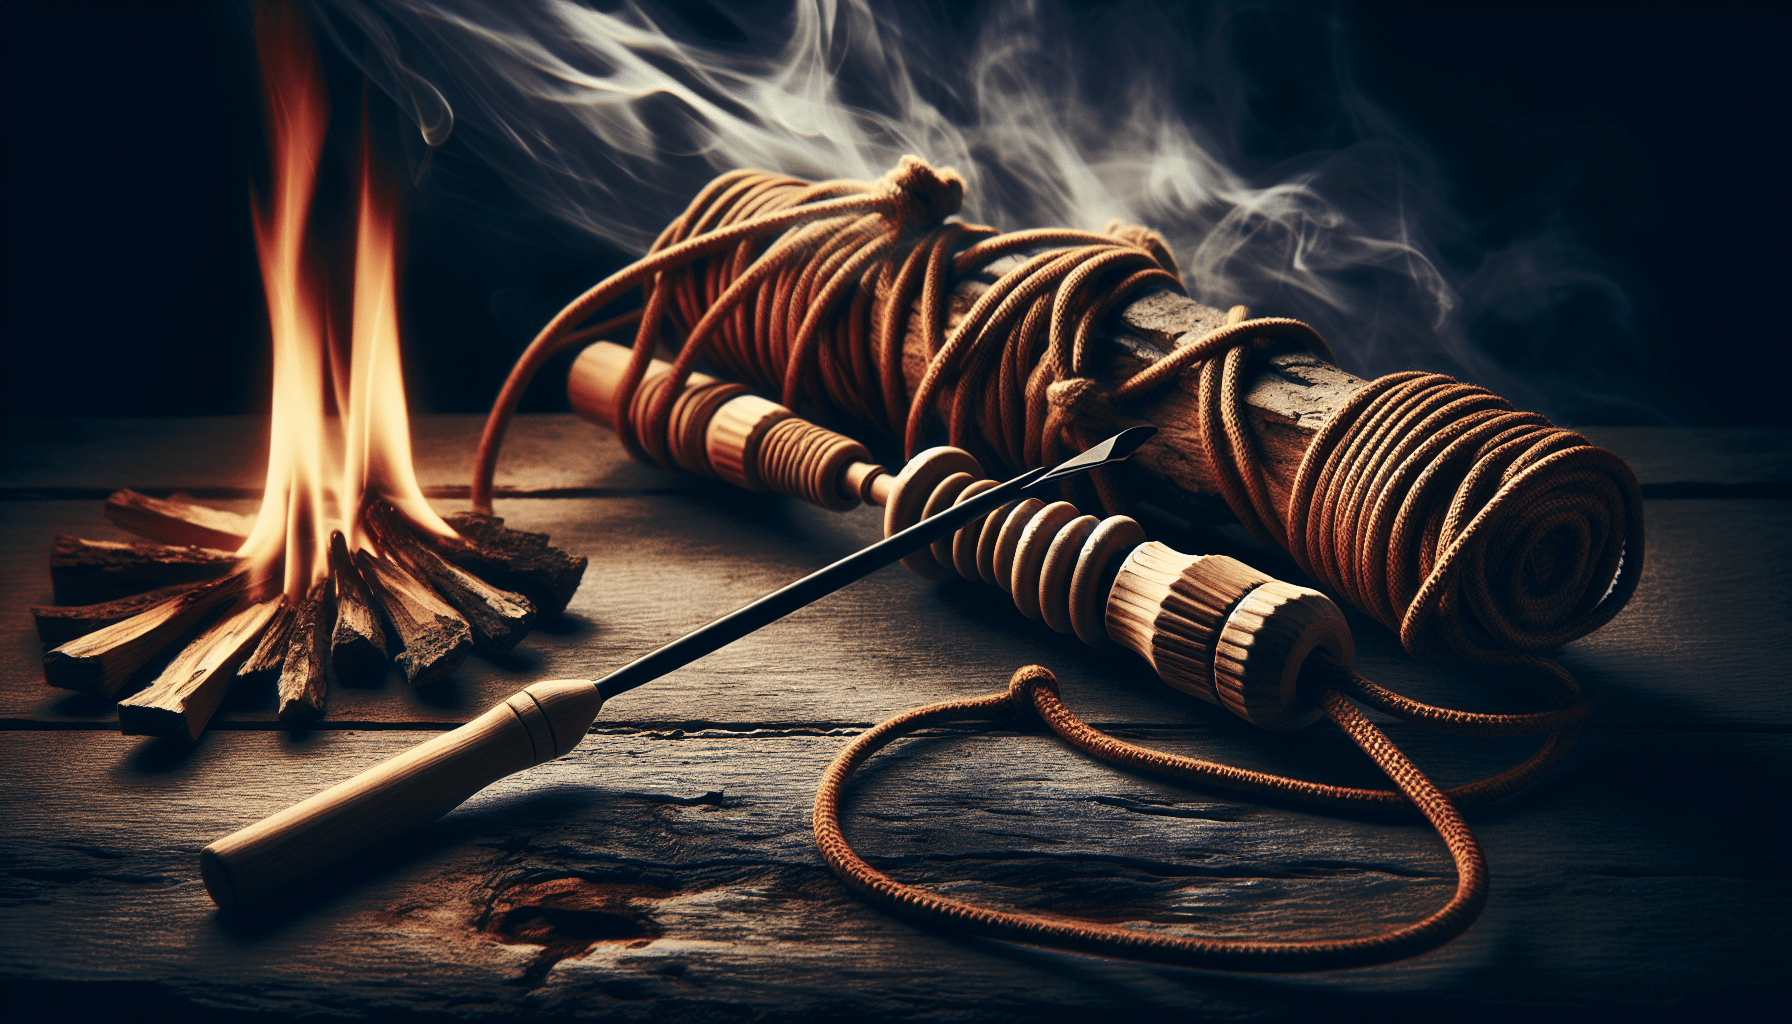
Understanding the bow drill components
To start a fire using the bow drill method, you need to understand its components. The bow drill consists of four main parts: the fireboard, the spindle, the bow, and the socket or handhold. The fireboard is a flat piece of wood where the ember will be produced. The spindle is a cylindrical piece of wood that will generate friction to create the ember. The bow is a flexible branch or piece of wood with a string attached to both ends. The socket or handhold is used to hold the spindle in place and apply downward pressure.
Preparing the fireboard and spindle
Before you can use the bow drill method, you need to prepare the fireboard and spindle. The fireboard should be made of a softwood, such as cedar or pine, that is dry and free of sap. Carve a small depression on the fireboard’s surface, which is where the friction will occur. As for the spindle, it should be long and straight, made from a hardwood like oak or hickory. Sharpen one end of the spindle to a point, which will be the part that creates friction with the fireboard.
Creating a notch in the fireboard
To facilitate the production of ember, you need to create a notch in the fireboard, adjacent to the depression. Carve a V-shaped notch in the side of the depression, pointing towards the edge of the fireboard. The notch will collect the charred wood or ember as you generate friction with the drill. Make sure the notch is deep enough to capture the ember effectively without obstructing the rotation of the spindle.

Assembling the bow and drill
Now it’s time to assemble the bow and drill. Take the bow and tie one end of the string tightly to one tip of the bow. Place the spindle in the socket or handhold, applying downward pressure to hold it steady. Place the other end of the spindle on the depression in the fireboard. By flexing the bow and trapping the spindle between the string, you create tension that allows rapid rotation when the bow is moved back and forth. Make sure the string is securely wrapped around the spindle to prevent slippage.
Generating friction with the bow drill
With the bow and drill assembled, it’s time to generate friction. Place your foot on the fireboard to stabilize it and provide resistance. Hold the bow with one hand, gripping it firmly but not too tight. Begin moving the bow back and forth steadily while maintaining downward pressure on the spindle. The spindle should rotate rapidly, producing friction against the fireboard. This friction generates heat, which will eventually char the wood and create an ember.
Building up ember with the drill
As you continue moving the bow back and forth, you’ll notice smoke and charred wood accumulating in the notch. This is the ember you want to build up. It may take several minutes of consistent motion before a viable ember forms. Once the ember is well-established, carefully remove the spindle from the socket or handhold, making sure not to disturb the ember. Lift the fireboard gently, allowing the ember to remain in the notch.
Transferring the ember to tinder
Now that you’ve successfully created an ember, it’s time to transfer it to your tinder bundle. Tinder refers to small, highly flammable materials, such as dried grass, leaves, or bark, that will catch fire easily from the ember. Carefully transfer the ember from the fireboard’s notch to the center of your tinder bundle, cradling it gently to prevent it from extinguishing. Surround the ember with the tinder material, creating a small nest-like structure that will allow the flame to grow.
Blowing the ember into flame
With the ember securely placed in the tinder bundle, it’s time to blow on it gently to encourage the flame to grow. Cup your hands around the tinder bundle, but be careful not to smother the ember. Blow on the ember with a steady yet gentle breath, focusing on directing the airflow towards the ember. As the tinder catches fire, continue blowing carefully to help the flame spread through the bundle. Once the flame becomes stable, you can transfer it to your prepared fire pit or kindling.
Building and maintaining the fire
Congratulations! You have successfully started a fire using the bow drill method. Now that you have a fire, it is essential to build and maintain it properly. Begin by adding small sticks and twigs to the flame, gradually increasing the size of the fuel as the fire grows stronger. Ensure good airflow by arranging the fuel in a teepee or log cabin structure, allowing oxygen to reach the flames. As the fire burns, continue adding larger pieces of firewood to keep the fire going. Remember to regularly tend to the fire, adding fuel as needed and keeping a safe distance from the flames.
Starting a fire without matches using the bow drill method requires patience, practice, and proper technique. By understanding each component, preparing the fireboard and spindle, and diligently generating friction, you can successfully start a fire in any outdoor survival situation.